Thursday, March 6, 2014


LOVING RIGHT THIS MINUTE


It's still winter here, but I'm already making my wish-list for summer.  These will be my must-haves: Denim, stripes, basics and leopard!

From left to right

ONE TEASPOON
DENIM SHORTS

FREE PEOPLE 
CIRCLE IN THE SAND TEE

 ISLA COLLECTIVE
THE S/S TEE

STEVE MADDEN 
ECENTRICS


Friday, February 7, 2014

I want to introduce you all to my good friend Marla Kuehn. She is as talented as she is beautiful.  Amazing homemaker, wife and mother of two.  
  Now, We all know my love for crafting, but hers trumps mine ten fold! She beautifies everything she touches but has found her knack creating the cutest glittered mason jars. She has just started up her little business so I wanted to spread the word! She makes them for all occasions and holidays. Here I have showcased her adorable Valentine jars.  You can see all her creations on IG under justaddglitterbymarla


Thursday, January 16, 2014


EASY SNACKING


This is something that has been seen and done a million times before, but boy does it make life easier!  I started this when my first was three, the age where they start asking for a snack 24/7! I would have to stop everything to first agree on a snack she could have, then prepare it. After I started doing this, I would just send her to the refrigerator.  Everything in the bin is something I don't mind my kids snacking on, healthy and relatively healthy snacks. Bagged grapes, celery, carrots, rice cakes, apple sauce, raisins, yogurt, fruit strips, and crackers. I put the bin within my children's reach so they can easily pick out what they want.  It doesn't get refilled until every snack is gone! Easy peasy!

Tuesday, January 14, 2014

TOP KNOT 101

Top Knot 101
  
Here are four different Top Knots you can create using the same basic steps. I always start with dirty hair and dry shampoo.  It stays put longer and is easier to manipulate on top of head. I never get a top knot I like first try. It takes me about five tries to end up with one I like, so just keep at it! And remember, the bigger and messier the better!

Top Knot One
Top Knot Two
 Top Knot Three
 Top Knot 4


Supplies Needed
 Dry shampoo (Sauve is my absolute fave). Comb. Hair tie. Bobbi Pins.


STEPS
Step 1- Gather hair on top of head and work into a pony tail in your hand
 Step 2-Compose a HALF ponytail. In other words, don't pull the hair all the way through. Just half way and secure hair tie
Step 3-Pull down on both ends to give your top knot more volume

Step 4-Now bring the hair that is hanging down in back around the front to hide your hair tie. Secure in back with bobbi pins. Try to hide pins within hair.


Finished look. 
 These steps just created Top Knot One. 

Stopping at step 2 will create Top Knot Two.  For Top Knot 2 and 4, it is a matter of twisting Step 2 and pinning with bobbi pins to create a knot you like.  There are really no directions to it.  

Monday, January 6, 2014

CALIFORNIA DREAMING
All this cold weather is making me want for lazy days on the beach. My favorite vacation spot in the world is Coronado Island, California. We go there every year. And then I spend the rest of the year longing to go back.


Saturday, January 4, 2014

DIY TISSUE TASSEL GARLAND


I saw these floating around the internet and thought they would be the perfect addition to my daughter's room. So much you can do with these...party decor, holiday decor (picture orange and black draped across the fireplace on Halloween) to home decor!  These sell anywhere from twenty to forty dollars a strand online. I figured it would be best just to make them!


Materials Needed:


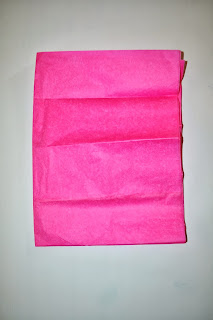
Unfold 2-3 sheets of tissue. Fold completely in half.
 Fold again in half longways
Fold again longways
 Fold again longways for the last time! :)
Now you are going to cut your stands. Make sure you cut up towards the folds at top of the tissue. Not vice versa
Now carefully unfold
Unfold one more time
Now cut straight down the center. This will now give you two tassels
Roll tassel long ways trying your best not to crumple strands. After you have rolled, twist in the middle to keep your roll in place
Bend in half at the middle
Now twist the two ends together and hot glue in the middle
You now have your tassel! Now you string it and repeat!


Friday, January 3, 2014

LET'S TALK HAIR!


HAIR! Your crowning glory! My favorite subject! 
As a hairstylist, I spent years working with pricey, quality salon products.  Great on the hair, not so great on the wallet.  Now that I am a stay-at-home mom, I've discovered homemade hair secrets that work just as well...maybe even better! 
Here they are...

WHITE VINEGAR
This is my number one cannot live without hair product. This is in my opinion the best hair-clarifier out there.  Once a week mix 1/4 vinegar with equal parts water. Apply to wet hair. Shampoo and condition as usual.  

BEER
Especially great for blondes. I apply after shampooing and before conditioning for added shine.  The alcohol also has added benefits of cleansing and softening.  Downside is this can be drying and you may smell like you partied all night. 

COCONUT OIL
Best deep conditioner around! I try to do this at least twice a week.  Apply generously to dry hair before bed. Sleep. Wash and dry as normal. I also lightly apply to ends after styling. It adds the perfect amount of smoothness and shine.

AVOCADO HAIR MASK
1 Banana
1 Avacodo
1 tsp Olive Oil
Another great one for shiny and soft hair.  You can throw this on your face as well! Blend all the ingrediants together and massage into hair from roots to end. Cover for 30 minutes. Shampoo and apply vinegar treatment above.  Condition and style as usual.